I started this year going over my blog again and wondering why I hated it so much. I hated the style. I hated the technology. I hated the editing experience. Hell, I even hated the stinking URLs. This year it bubbled to a head as I took on a new role and wanted a better place to write.
Along the way, I discovered some fantastic tools to build a blog and ship a completely new version “the right way (for me, totally up to the discretion of what I value).” TLDR, I use Gatsby, Tailwind, and Cloudflare Pages to ship and fully transition this blog insanely quickly.
Knowing My Values
I literally titled this blog A Clean Slate, which best sums up the SEO on this thing. This will sound weird, but SEO isn’t really something I care about in this transition. I may have cared more if I had strong SEO performance, but with ~50 users a month, I felt like I wouldn’t be losing much ignoring my existing SEO.
What I do care a ton about is old links. If anyone links to one of my pages, I really care that they can still get to that old content. I believe the web should allow for changes while still leaving some artifacts of what came before. Migrating and breaking everything doesn’t create the world I want to live in. Part of the reason Google and I have a strained relationship…
Rebuild with Gatsby and Tailwind
So let’s start with the fun development part: the technology stack. I don’t love Gatsby, but I love how well my site performs over at AddSubtitles.tv. It’s fast, and I love how well images load on the site. I’ve built some great translation scripts, and I’ve gotten used to the clunky Gatsby configuration on the site. Sure… it’s probably just Stockholm Syndrome talking, but I’ve come around to modern Gatsby a bit.
Tailwind CSS is a tool I’ve never really dabbled with before. Theme UI has been my jam for a good 15 months or so, and I’ve only recently started looking for options after a bit of an Emotion dependency fiasco. I gotta say, Tailwind CSS changes the game to make me feel like I can performantly build sites fast and not worry about my CSS management.
I’d like to touch on two parts of the Tailwind experience:
- Building a new site from scratch and how Tailwind jumpstarts that whole process
- The customization and capabilities that I’ve been loving as I’ve grown closer with Tailwind
Jumpstarting Projects with Tailwind
Think about how intimidating it is to build anything from scratch. There’s a vast blank terminal, editor, or paper sitting there betting against your ability to do anything interesting with the space you’ve been given. Tailwind kills that space kindly with sane defaults that immediately let you get to work.
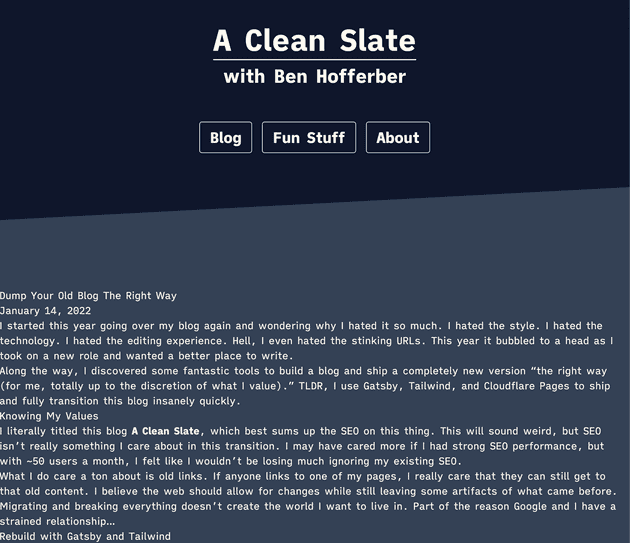
One tool for “blank page intimidation destruction” is the prose class. This class effectively turns something that looks like a newbie’s first HTML page…
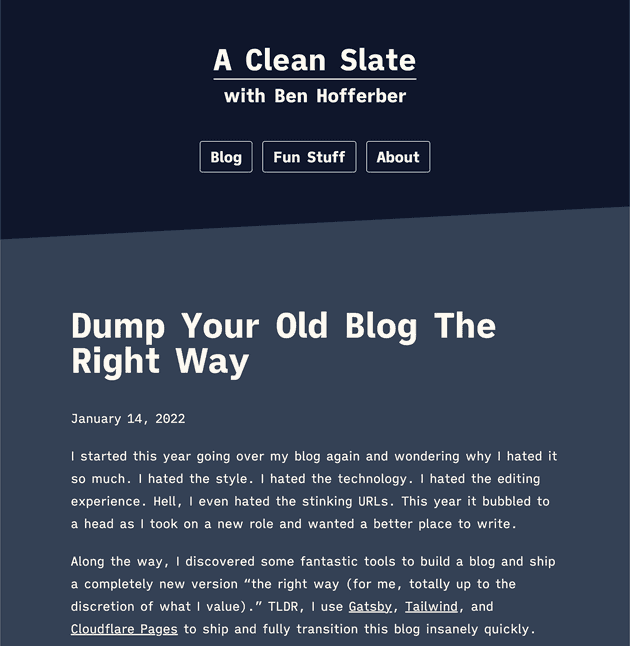
…into something that looks professional with attentional detail to quality design. I seriously don’t think I would have finished this blog in under a month without having a tool like this under my belt.
While you have these power classes that give you a ton of capability, you’ve also got an expansive library of examples to draw from. Tailwind has some pretty incredible documentation to select prebuilt stuff from. I find myself using something from here as a base and customizing to get what I’m looking for.
Customizing with Tailwind
Second is the really great customizations that are available in Tailwind. With an extensible notation, you can take the same classes you regularly use to style interaction events, dark mode, various screen sizes, and more! The ability to quickly style across screen sizes gives me a ton of what I love from Theme UI without constructing objects.
// Example code using Tailwind customizations
<div data-is-root-path={isRootPath}>
  <div className="top-stripe bg-slate-700 dark:bg-slate-900 pt-80 md:pt-96">
    <div></div>
  </div>
  <header className="bg-transparent text-amber-50 p-2 pt-12 mb-20 md:mb-48">
    {header}
  </header>
  <main>{children}</main>
  <div className="relative overflow-hidden h-44">
    <div className="absolute w-full -skew-y-3 h-44 -bottom-20 bg-slate-700 dark:bg-slate-900"></div>
  </div>
  <footer className="bg-slate-700 dark:bg-slate-900 p-6 pb-20 text-amber-50">
    <div className="text-center text-lg">
      <span>© {new Date().getFullYear()} Ben Hofferber</span>
    </div>
  </footer>
</div>
The findability of a lot of these customizations can be a little taxing. Fortunately, the documentation and the IntelliSense make things easy for users of the library. I’m still unsure how to get the same IntelliSense when I break out common classes into a separate variable, but I’ll report back when I learn more.
Deploying and DNS with Cloudflare
I’ve recently been excited about Cloudflare Pages and Domain management. I first got interested when I read their amazing documentation on how basic building blocks of the internet works. Explaining these sorts of things simply is really challenging and shows a lot of mastery over the domain.
Using Cloudflare Pages is honestly a lot like deploying to Netlify or Vercel. It’s a newer experience, so it has fewer bells and whistles, but it really does one thing well: deploy sites. I set up my build to generate new pages when branch PRs are created to test things out before I deploy the final version, and then pushing to main is all I need to do to deploy.
I previously had my domain on AWS Route53, and I was a little worried about bringing it across due to all the other configurations on the domain. I tested this out first on Hofferbar, a fun site I made for my home bar. That took a while to get right and figure out where the correct DNS settings were. When I got it right, though, I was blown away.
Cloudflare switched my site’s DNS options over in a matter of minutes. What usually takes days happened almost instantly. This allowed me to quickly test, make changes, and adjust while knowing that I’d be able to see changes rapidly. When transitioning something like MX email records, I really care that I get it transitioned quickly without incident.
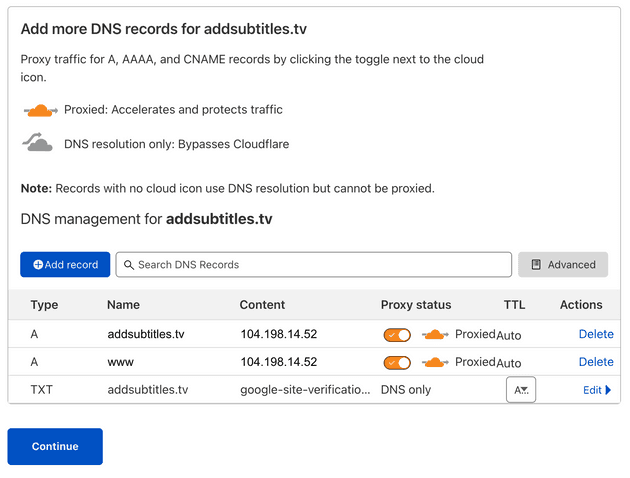
When transitioning my site over, I found another fantastic quality of life feature: pre-set DNS configuration. As I started migrating the DNS management, my first step was setting the options from my previous domain. Some are already loaded in, and the rest can be easily added here. This gave me a ton of stress relief and really helped me feel confident in the transition.
I’m super impressed with Cloudflare and will likely buy more stock now that the price has dropped in half. 😅 Not investment advice! I transitioned the site today and haven’t had a single problem.
Keeping Links Working
I’ve completely changed how my blog sets up URLs to sanely categorize blog posts. This comes with the downside that links will no longer work to my previous blog posts. As I mentioned earlier, a significant success metric for me is keeping links to my old blog working in the new.
I decided to introduce a subdomain legacy within my domain to host my old blog. This was pretty easy to set up with a subdomain in Route53 with the Name Servers redirected by Cloudflare. All I needed to do to finish things up was redirect users from my 404 page to the old site. I did this with a simple script on that Not Found page.


